 marktwincitiesdrywall@gmail.com
Master Drywall Repair: A Guide for Flawless Walls
Understanding Common Wall Damage Types
Before beginning any restoration project, identifying the specific type of damage is critical for determining the appropriate approach and materials. Wall surfaces experience various forms of deterioration, each requiring distinct techniques for successful restoration.
Small holes from picture hangers, doorknob impacts, or furniture collisions are among the most frequent issues homeowners encounter. These typically measure less than one inch in diameter and penetrate only the surface layer. Larger openings extending beyond two inches often result from accidental impacts or when removing fixtures during renovation projects. These require more substantial patching techniques and reinforcement materials.
Surface cracks develop from structural settling, temperature fluctuations, or improper installation during construction. In Lakeville’s climate, the freeze-thaw cycles throughout winter and spring create expansion and contraction that can stress wall materials, leading to hairline fractures that gradually widen over time. Water intrusion from roof leaks, plumbing failures, or basement moisture creates softened, discolored sections that must be addressed promptly to prevent mold growth and structural compromise.
Dents and dings from everyday household activity accumulate over years of use, particularly in high-traffic areas like hallways and children’s rooms. Textured surfaces present additional complexity, as matching existing patterns requires specific tools and practiced application techniques. Understanding these damage categories enables homeowners to gather appropriate supplies and set realistic expectations for the restoration process.
Essential Tools and Materials for Success
Assembling the right equipment before starting prevents mid-project delays and ensures professional-quality results. While specialized contractors maintain extensive inventories, homeowners can achieve excellent outcomes with a focused selection of essential items.
For patching compounds, lightweight spackling works well for minor imperfections up to one-half inch, drying quickly and sanding smoothly. Joint compound, available in setting-type or ready-mixed formulations, handles larger applications and provides superior durability for substantial damage. Setting-type compounds offer faster curing times and minimal shrinkage, while ready-mixed versions provide easier workability for those with limited experience.
Putty knives in four-inch and six-inch widths allow precise application in tight spaces and broader coverage for larger sections. A ten-inch or twelve-inch taping knife becomes necessary for feathering edges and creating seamless transitions between patched areas and existing surfaces. Medium-grit and fine-grit sandpaper or sanding sponges smooth dried compound without creating excessive dust. A quality dust mask and eye protection prevent irritation during sanding operations.
For openings larger than two inches, self-adhesive mesh patches or backing boards provide necessary support. A utility knife with fresh blades ensures clean cuts when preparing damaged areas or trimming patch materials. Primer and matching paint complete the restoration, sealing repaired sections and blending them invisibly with surrounding walls. A handheld work light reveals surface irregularities that overhead lighting might miss, enabling precise evaluation throughout the process.
Having these materials readily available transforms what might seem like a daunting task into a manageable project that most homeowners can complete successfully over a weekend.
Preparing Damaged Areas Properly
Proper preparation determines whether a restoration blends seamlessly or remains visible long after completion. Rushing through preliminary steps often results in patches that crack, shrink, or show texture differences from surrounding areas.
Begin by removing loose material around the damaged section. Use a utility knife to cut away torn paper facing, crumbling compound, or fractured surface material until reaching solid, stable edges. Creating clean, defined boundaries prevents future delamination and provides a solid foundation for new material. For holes, slightly widen the opening to create a beveled edge that allows compound to grip more effectively.
Dust and debris prevent proper adhesion, so thoroughly clean the work area with a dry brush or vacuum attachment. Any moisture present in the damage zone must dry completely before applying patching materials. In Minnesota’s humid summer months, running a dehumidifier or fan can accelerate drying times and prevent complications.
For larger openings, install backing support before applying surface compounds. Self-adhesive mesh patches work well for holes up to four inches, while openings beyond that size require cutting a piece of backing board slightly larger than the hole, inserting it through the opening, and securing it with screws or adhesive. This creates a stable platform that prevents sagging and cracking as compound cures.
Inspect surrounding areas for underlying issues that caused the original damage. Water stains indicate moisture problems requiring resolution before cosmetic restoration. Cracks radiating from corners or along seams might signal structural movement that will cause new damage if not addressed. Taking time to investigate root causes prevents repeated failures and ensures lasting results.
Application Techniques for Smooth Results
Application method dramatically affects final appearance, with patient layering producing superior results compared to attempting single heavy coats. Understanding how materials behave during application and curing prevents common mistakes that create additional work.
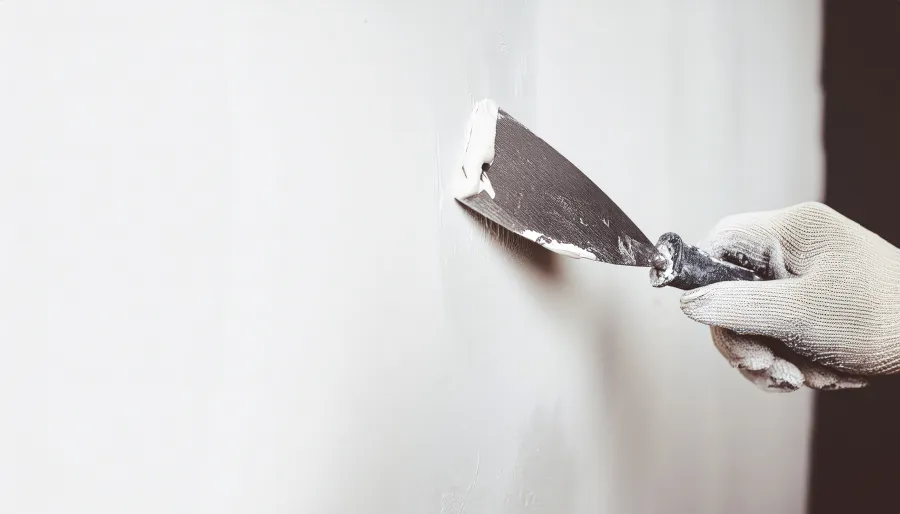
For small holes and dents, load a moderate amount of compound onto a putty knife and apply it firmly across the damaged area, pressing material into the depression. Hold the knife at approximately forty-five degrees to the wall surface, drawing it across the area with firm, steady pressure. Excess material should feather out beyond the immediate damage, creating a gradual transition that becomes invisible after sanding.
Larger areas require multiple thin coats rather than one thick application. Apply the first layer to fill the deepest portion of the damage, allowing it to cure completely before adding subsequent layers. Each coat should extend slightly beyond the previous one, gradually building up the surface while expanding the feathered edge. This technique minimizes shrinkage cracks and creates smoother transitions requiring less aggressive sanding.
For patches over mesh or backing boards, the first coat embeds the reinforcement material and fills the void. After this foundation layer cures, apply a second coat to bring the surface level with surrounding areas. A third skim coat with a wider knife feathers edges and eliminates any remaining irregularities. Between each application, allow adequate drying time as specified by the product manufacturer. Rushing this process by applying subsequent layers over insufficiently cured material leads to cracking and failure.
When matching textured surfaces, allow the final coat to reach a leather-hard state, then apply texture using appropriate tools. Knockdown textures require a trowel or broad knife to lightly flatten raised portions after initial application. Orange peel and splatter textures use specific spray equipment or hand tools to recreate existing patterns. Testing texture application on cardboard before attempting wall application helps develop the technique and achieve consistent results.
Finishing Touches for Professional Appearance
The difference between acceptable and exceptional results lies in meticulous finishing work. After compound applications cure fully, typically twenty-four hours for standard joint compound, sanding creates the smooth surface necessary for invisible integration with existing walls.
Begin with medium-grit sandpaper (100 to 120 grit) to remove high spots and blend transitions. Use circular motions with light pressure, frequently checking progress with your hand and adjustable lighting positioned at an angle to reveal imperfections. A handheld light creates shadows that highlight ridges, valleys, and texture inconsistencies invisible under standard room lighting. Sand only the raised compound, avoiding excessive abrasion of surrounding painted surfaces which creates unnecessary refinishing work.
After initial smoothing, switch to fine-grit paper (150 to 220 grit) for final surface preparation. This removes scratches left by coarser abrasives and creates an ultra-smooth foundation for primer and paint. Sanding sponges work particularly well for this stage, conforming to slight surface contours while maintaining consistent pressure. Throughout the sanding process, wear respiratory protection and contain dust with plastic sheeting in doorways.
Vacuum or wipe away all sanding dust before priming. Dust particles trapped under primer create a rough surface requiring additional sanding and refinishing. Apply a coat of quality primer formulated for patched surfaces, which seals compound and prevents it from absorbing paint differently than surrounding areas. Some primers include stain-blocking properties valuable when addressing water damage or other discoloration.
After primer dries, apply finish paint matching existing wall color. Using paint from the original application ensures perfect color matching, though paint stored for extended periods may require mixing to restore consistency. Apply at least two coats to the repaired area, feathering edges into surrounding surfaces. For best results, roll or brush paint over the entire wall from corner to corner, preventing subtle sheen differences that occur when painting only patched sections.
Homeowners often wonder whether tackling these projects themselves or hiring professionals makes better sense. Twin Cities Drywall, LLC serves Minnesota residents with skilled craftsmanship in wall restoration, ceiling finishing, and interior painting projects of all sizes. Their experienced team handles everything from minor patching to complete room renovations, delivering flawless results that enhance home value and appearance. When time constraints, physical limitations, or project scope exceed comfortable DIY parameters, their proven track record and attention to detail provide confidence that work will be completed correctly the first time.
Inspect finished work under various lighting conditions to identify any remaining imperfections. Morning sunlight streaming through windows reveals surface irregularities invisible under evening artificial light. Minor touch-ups identified during this inspection require minimal effort compared to discovering issues after furniture returns and rooms resume normal use. Taking pride in thorough finishing work results in restored walls indistinguishable from original construction, maintaining home aesthetics and protecting long-term property value.